A project that I’ve been working on during the Christmas holidays was to hook up some thermal probes to my Raspberry Pi, just to play around. This tutorial simply follows the steps that I’ve taken to achieve so.
You’ll need:
- Raspberry Pi, any flavor as long as it has GPIO headers available. I had a Raspberry Pi 2, so I used that.
- You’ll also need the usual suspects – USB to MicroUSB to hook it up to power, HDMI to connect it to a display for initial configuration and an ethernet port to manage it through SSH. I highly recommend configuring SSH rather than using the device itself. This tutorial assumes you’re using SSH.
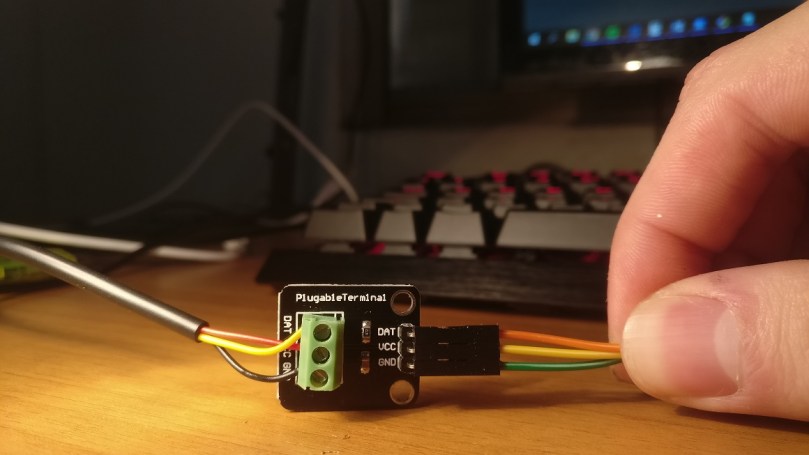
- A DS18B20 sensor – I’d suggest getting one which includes a Plugable Terminal to avoid soldering – just wire it up and you’re good to go. I got mine from AliExpress
- Also make sure your kit has 3 jumper cables. They are typically included. Just to be sure, I also got a set of female to female jumper cables from AliExpress though I did not use them for the DS18B20 sensor.
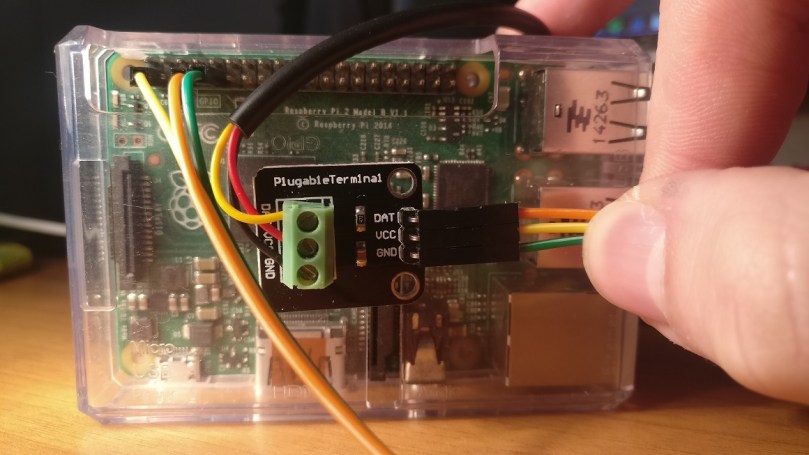
All right, let’s wire it up! The DS18B20 sensor requires three pins – data, VCC (3.3V), and ground. Connect the wires as below. Data is yellow, VCC is red and ground is black.
Connect the 3 pins using the jumper cables as shown below.

We’ll also need to instruct the Raspberry Pi that we’re going to connect the DS18B20 sensor. This sensor makes use of the 1-Wire protocol, so let’s activate it:
- Connect to the Raspberry Pi using SSH
- Let’s start by editing the config file that the Raspberry PI parses every time it boots up:
sudo nano /boot/config.txt - Go to the end of the document and input the following. Specifying gpiopin=4 is actually optional since by convention, 1-wire devices are expected on gpiopin 4 on the Raspberry Pi.
# Enable OneWire Protocol

dtoverlay=w1-gpio;gpiopin=4 - Time to reboot the Raspberry Pi
sudo reboot - Once the Raspberry PI reboots and you re-connect using SSH, it’s time to get data from the sensor! Let’s find the 1-wire devices connected to the system. Let’s start by browsing to the appropriate directory.
cd /sys/bus/w1/devices - Great! Let’s now see the devices attached to the Raspberry Pi.
ls - This will get the devices attached using the 1-Wire protocol. You should have a device called 28-xxxxxxxxxxxx (where x stands for your unique 12 digit serial number). Let’s now browse the device. Mine is 28-02199245e07b, so let’s use it an example.
cd 28-02199245e07b - Once you access the device, there should be a file called w1_slave. Let’s see the contents of the file.
cat w1_slave - The file should look like this:
0b 01 55 05 7f 7e 81 66 bf : crc=bf YES

0b 01 55 05 7f 7e 81 66 bf t=16687
- If the file looks like the above, great! The temperature component is t=16687. The temperature in this case is 16.687 °C
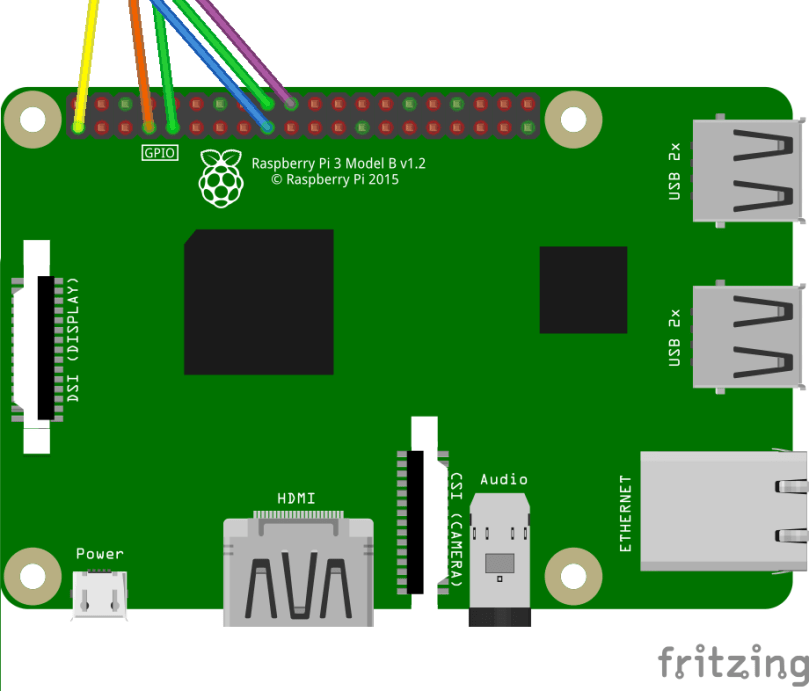
We also can take this to the next level and add another thermal probe! Attach it as shown below.

This will require re-editing the /boot/config.txt. Let’s do it!
- Re-open /boot/config.txt –
sudo nano /boot/config.txt - Go to the end and add the following. I chose pin 24 because it’s easy to wire since it’s close to a 3.3v and ground.
dtoverlay=w1-gpio;gpiopin=24 - Close and save, then
cd /sys/bus/w1/devices - You should now see two devices as 28-xxxxxxxxxxxx
Of course, at this stage we did get the temperature, but it’s not really usable. We can get access to this information programmatically – this is what we’ll be doing in the next part of this tutorial. We’ll also be eventually showing the information on a separate LCD screen! Stay tuned!

Adding dtoverlay=w1-gpio;gpiopin=4 and dtoverlay=w1-gpio;gpiopin=24 to /boot/config.txt didn’t work for me. Perhaps something changed in the 4 years since this article was written (I’m running Buster) but it appears that a semicolon isn’t a valid separator for dtoverlay and will prevent the overlay from loading. It should be a comma: dtoverlay=w1-gpio,gpiopin=4 and dtoverlay=w1-gpio,gpiopin=24.
LikeLike